
Rustic Barn Wood Finish: Transform Furniture With Farmhouse Charm

A rustic barn wood finish turns everyday furniture into pieces that feel worn, welcoming, and full of story. Instead of hunting for pricey reclaimed boards from old country barns, a simple finish can recreate that sun-faded, timeworn look right at home. Grain, knots, and natural imperfections begin to stand out, echoing the character of old farm tables and weather-beaten fences. Soft, earthy layers of color, gentle distressing, and thoughtful sealing bring depth and durability, so each piece feels both aged and ready for daily life. This style fits beautifully in Central Louisiana, pairing just as well with a classic Acadian cottage as with a modern home near the Red River or around Alexandria’s historic districts. Farmhouse charm blends smoothly with local décor, from vintage finds picked up along Highway 28 to handmade art from downtown markets. A rustic barn wood finish offers an affordable, creative way to achieve the look of reclaimed lumber without the cost or hassle of sourcing old boards. With the right prep work, a few smart tools, and a focus on texture and tone, plain furniture begins to resemble something pulled from a working barn or a long-forgotten shed. The process feels hands-on and rewarding, and the final look adds warmth, character, and a touch of country comfort to any Louisiana home.
Quick Navigation:
Understanding the Rustic Barn Wood Look | Preparing Furniture for a Barn Wood Finish | Layering, Distressing, and Sealing the Finish | Frequently Asked Questions
Understanding the Rustic Barn Wood Look
A rustic barn wood finish does more than add color; it copies the depth, texture, and uneven tones seen on boards that sat through years of sun, rain, and Southern humidity. Instead of one flat shade, the look blends cool grays, warm browns, and soft, faded highlights that shift with the light. Edges often appear slightly rubbed down, while flatter areas hold a chalky, weather-beaten feel. Light and shadow catch in the grain, giving furniture that “found on an old farm” charm, and setting the stage for choosing the right tones, tools, and layering steps that follow.
Keep in Mind: The rustic barn wood finish involves applying a whitewash technique using lime-based solutions that penetrate wood grain, enhancing natural textures while providing antimicrobial properties from the lime.
Source: ResearchGate
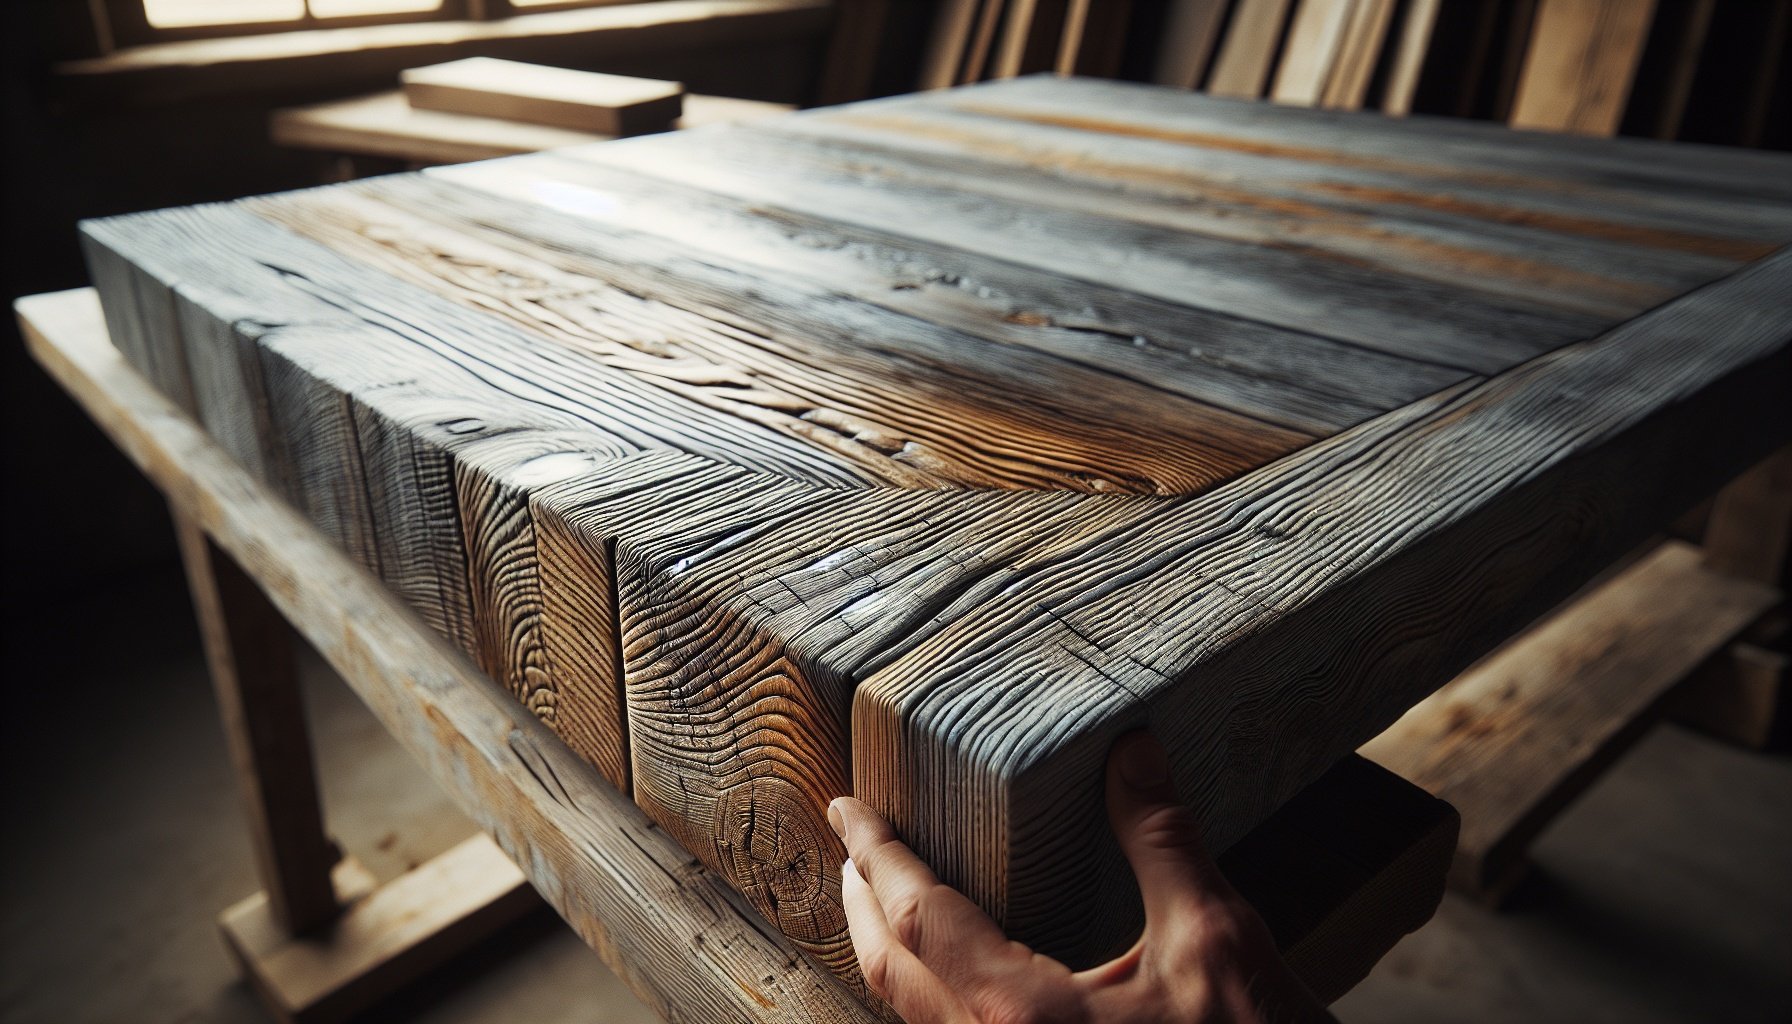
Key features of authentic barn wood: grain, knots, cracks, and color variation
Authentic barn wood shows strong grain lines that rise and fall across the board, almost like ripples on Cane River Lake after a passing boat. Deep, uneven grooves mark the softer parts of the wood, while harder streaks stay slightly raised, catching light differently. Knots rarely look perfect; they are oval, split, or darkened, sometimes with tiny gaps around the edges. Old boards usually carry fine cracks that run with the grain, plus a few larger checks where the wood dried under years of sun and rain. Color rarely stays uniform, shifting from warm browns to cool gray, with darker bands where boards were once covered and lighter, sunburned sections where weather hit hardest.
Choosing the right furniture pieces and wood types for a barn wood finish
Furniture with simple, flat surfaces showcases a barn wood finish best, letting the grain pattern and color shifts stand out like old siding on a weathered barn. Solid wood pieces such as pine, poplar, and alder accept distressing easily and develop soft edges and worn corners that feel convincing. Hardwoods like oak and ash already have bold grain, so a barn wood finish can exaggerate the raised lines and deeper pores for extra texture. Tables, dressers, headboards, and cabinet doors with straight profiles echo classic farmhouse lines seen across Central Louisiana farmhouses. Avoid heavy curves or thick factory topcoats, which fight the rustic look and make it harder for layered stain and paint to grab the surface properly.
Good to Know: Technological innovations in 2025 include AI-guided laser etching on barn wood, allowing precise replication of rustic finishes that mimic aged patinas without chemical weathering.
Source: Reuters
Pulling farmhouse charm into Central Louisiana homes: blending rustic style with local décor
A rustic barn wood finish settles easily into Central Louisiana homes, tying farmhouse character to local stories and surroundings. Weathered gray and warm brown tones echo old barns along Highway 28 and aged cypress camps on Toledo Bend, while soft white washes feel right at home beside light-colored brick common around Alexandria. Distressed console tables can hold Mardi Gras beads in Mason jars, framed photos from the Rapides Parish Fair, or books about Huey P. Long and Louisiana history. A barn wood headboard pairs nicely with cotton-pattern quilts, cane baskets from local markets, and metal lanterns that feel at home on a camp porch at Catahoula Lake, turning simple furniture into a quiet nod to Central Louisiana roots.
Preparing Furniture for a Barn Wood Finish
Before any stain, paint, or glaze touches a brush, furniture benefits from the right prep work. Solid prep turns a simple piece into something that truly looks like it came out of an old barn outside Alexandria or along a back road in Rapides Parish. Surfaces need to be cleaned, sanded, and sometimes repaired so the barn wood layers can grab on and blend smoothly. Glossy factory finishes must be knocked down, loose joints tightened, and hardware either removed or protected. With the furniture stable, clean, and dull-sanded, every step of the rustic barn wood finish applies with less fuss and better, more believable results.
Quick Insight: Using reclaimed barn wood for furniture finishes reduces environmental impact by diverting 1.5 million tons of wood waste annually from landfills, supporting circular economy principles in woodworking.
Cleaning, sanding, and repairing surfaces for an even, textured base
Clean, solid surfaces make the layered barn wood colors sit right and blend naturally. Start by wiping away grease, dust, and old polish with a degreaser or a mix of mild soap and warm water, then let the piece dry completely. Lightly scrape or strip any loose finish so new products bond well instead of peeling. Sand flat areas with medium-grit paper to knock down gloss, then switch to a finer grit to smooth without erasing all character. Deeper scratches, chipped corners, and nail holes can stay for rustic charm, but any wobbling joints, soft spots, or missing veneer need wood filler or glue and clamps. A quick pass with a wire brush opens the grain just enough to catch those weathered farmhouse layers later.
Creating faux age marks: intentional dents, scratches, and saw marks
After the surface is cleaned, sound, and sanded, small “battle scars” add believable barn wood character. A rubber mallet or rounded hammer face taps in soft dents along corners, leg bottoms, and edges where real boards take abuse. A large screw or nail dragged lightly with the grain creates long, shallow scratches that read like years of sliding crates and tools. A hand saw or dull chisel can be rocked or bounced across the surface to leave short, irregular saw marks that mimic old mill cuts. Keeping all marks running with the grain and varying pressure prevents a fake, patterned look so the finish later settles into these low spots like true weathered barn boards.
Expert Insight: In Scandinavian design culture, rustic barn wood finishes embody hygge, promoting cozy interiors that connect modern living with agrarian traditions through handcrafted wooden furniture.
Source: BBC Culture
Selecting primers and base coat colors that mimic weathered barn boards
Primer and base coat colors set the “old lumber” tone long before the grain lines and scuffs show. For raw or heavily sanded furniture, a bonding primer in gray or tan grips well and cancels out any leftover stains so the barn wood colors read true. A soft, medium gray primer works well for cool, silvery barn boards, while a warm beige or camel primer suits sun-faded brown planks.
The base coat becomes the deepest “shadow” between faux boards. For a classic Central Louisiana hay-barn look, a deep charcoal, chocolate brown, or warm espresso base coat mimics aged heart pine soaked with years of weather. For drifted, sun-bleached styles, a cooler slate gray or muted taupe underlayer helps top coats break through like worn, washed-out barn siding.
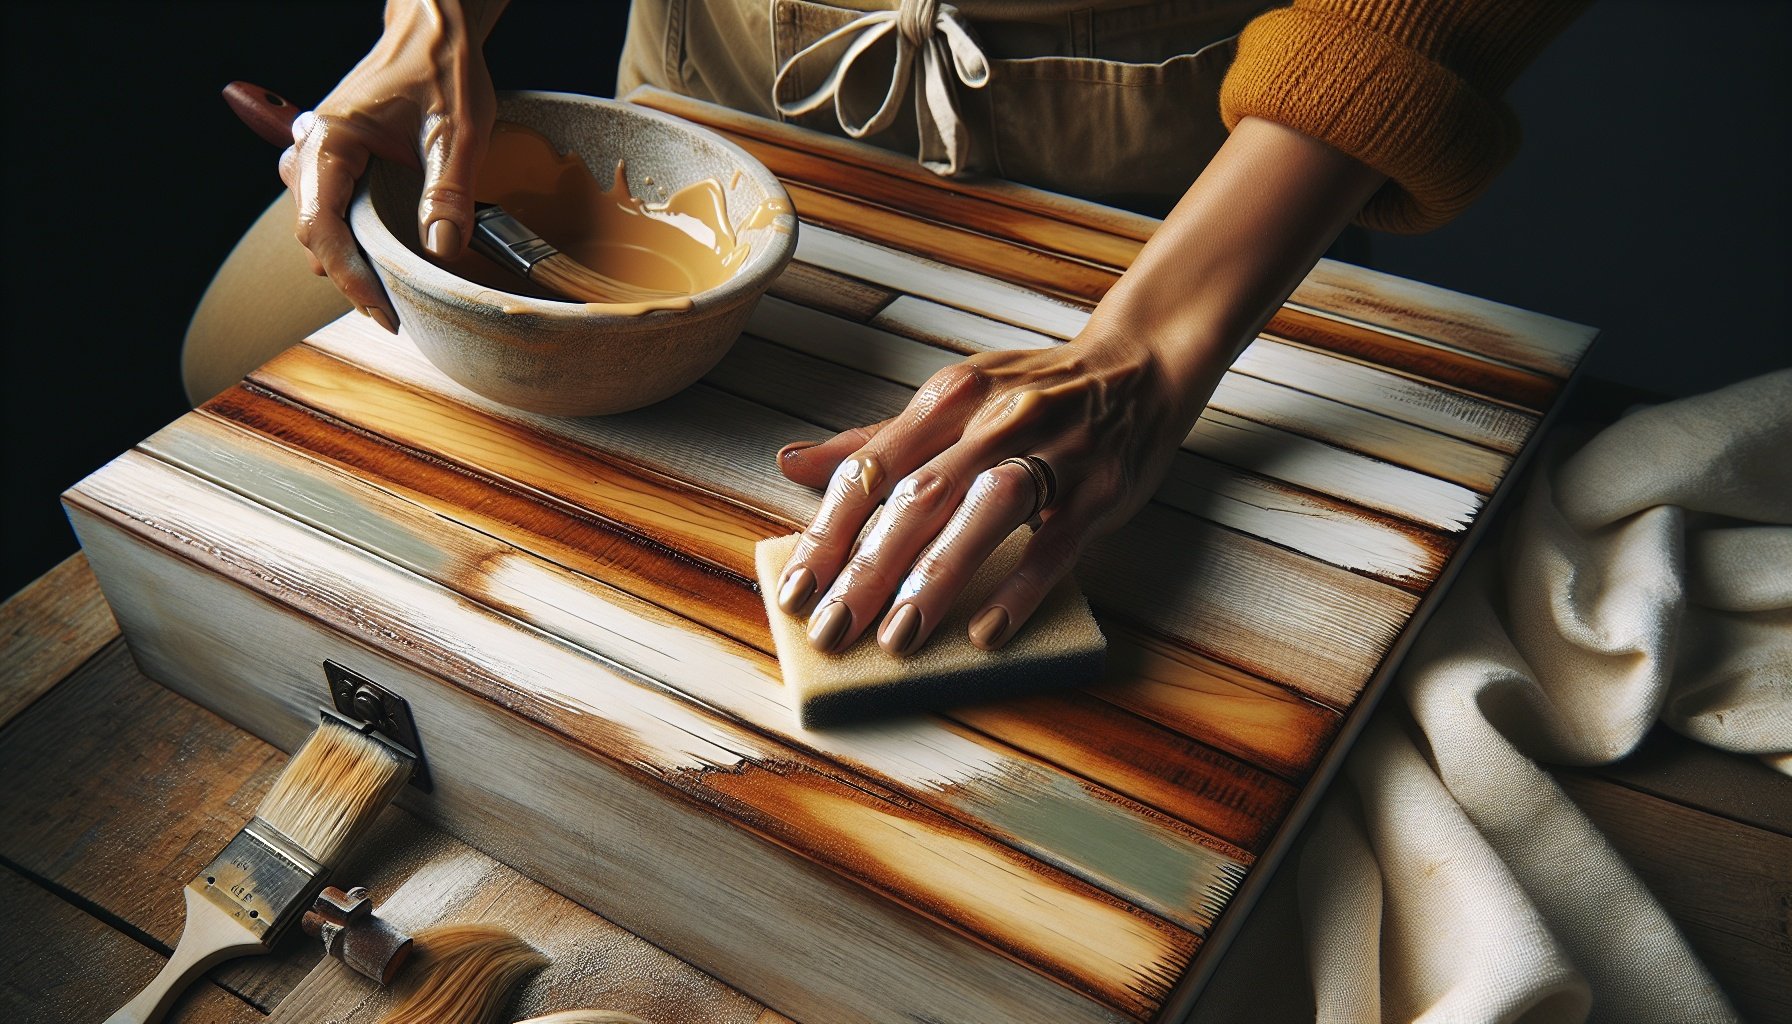
Layering, Distressing, and Sealing the Finish
With the overall look in mind, the real magic happens once the layers start building. Each coat of stain or paint changes how the grain catches light, so the order, thickness, and color of those layers matter. Distressing then breaks that surface back down in a controlled way, targeting corners, edges, and spots that would naturally take a beating in a busy Louisiana home. The final sealer locks everything in place, adding just enough protection without ruining the soft, timeworn feel, setting the stage for detailed steps on layering, distressing, and sealing the finish properly.
Layering earthy paint tones, dry brushing, and color washing for depth
Layering earthy paint tones, dry brushing, and color washing builds the kind of depth seen on beams in old Central Louisiana barns. A medium base tone such as warm taupe or soft saddle brown lays the “seasoned wood” foundation. A lighter shade like creamy beige or weathered tan is then dry brushed across the surface with most paint wiped off the bristles, so only the high spots catch color and mimic sun-faded boards. A thin color wash—often a gray, tobacco brown, or muted clay—gets brushed on and quickly wiped back, settling into low spots and open grain. These stacked, transparent layers keep the wood from looking flat and give each piece a rich, barn-worn character.
Pro Tip: Reclaimed barn wood gained popularity in the 19th century when American pioneers repurposed old barn timbers for furniture, creating durable pieces that reflected rural heritage and resourcefulness.
Source: Wikipedia
Using wire brushes, sanding blocks, and scraping tools to reveal ‘worn’ areas
Wire brushes, sanding blocks, and scraping tools turn those layered colors into a believable “barn-worn” surface. A stiff wire brush follows the grain to cut through the lighter dry‑brushed layer first, so darker tones show in the grooves like boards along a weathered fence line. A medium‑grit sanding block then softens high spots on corners, edges, and around handles, where hands and boots would naturally wear the finish down over time. A paint scraper or dull putty knife can be dragged lightly across flat areas to create small chips, streaks, and scuffs that echo old stall doors and hay loft ladders, leaving a finish that feels like it has worked hard for years.
Keep in Mind: The global reclaimed wood market, including barn wood for furniture, reached USD 173 million in 2025, growing at a 5% CAGR due to demand for sustainable rustic aesthetics.
Source: Archive Market Research
Sealing the rustic finish with clear coats or waxes for durability in Louisiana humidity
Sealing locks in all that layered color and distressing so it can stand up to sticky Central Louisiana summers. High humidity pushes moisture into bare wood and soft paint, so a clear topcoat or furniture wax adds a protective shell without killing the rustic feel. A water-based matte polyurethane or clear acrylic works well over paint, keeping tones from yellowing while resisting everyday scuffs and ring marks from cold drinks after a long day at the Sugar Festival in New Iberia or a ballgame in Alexandria. For a softer, hand-rubbed barn look, a clear wax buffs into a low sheen that highlights brush marks and wire-brushed grain, giving that “been-around-awhile” character while staying tough through damp weather.
Conclusion
A rustic barn wood finish replicates the aged, textured appearance of reclaimed lumber, giving everyday furniture that “found on an old farm” charm. Solid prep work—cleaning, sanding, tightening loose joints, and protecting hardware—sets the stage for rich color and believable character. Careful layering of stain, paint, and glaze in earthy tones lets light play through the grain, while controlled distressing on edges and high‑touch areas adds the look of real, hard-earned wear. A protective sealer then locks in the finish while keeping the surface soft and timeworn. With patience and a steady hand, any plain piece can gain the warmth, depth, and farmhouse soul of vintage barn wood. Time to turn those tired surfaces into true conversation starters.
Frequently Asked Questions
- What is a rustic barn wood finish, and what makes it different from regular wood stain?
- A rustic barn wood finish is a decorative finish that makes new or existing furniture look like aged, weathered boards pulled from an old barn. Instead of a smooth, perfect look, the goal is character: soft color variations, visible grain, and a slightly worn, lived‑in surface.
Regular wood stain usually provides an even, uniform color and highlights the grain in a clean way. A rustic barn wood finish is different because:
– It uses layered colors instead of just one stain shade.
– It often includes dry brushing or color washes to mimic sun‑fading and age.
– It may include light distressing (scuffs, soft edges, and subtle wear spots).
– It aims for a matte or low‑sheen topcoat instead of a shiny finish.The result is furniture that feels like it carries a story, perfect for farmhouse, rustic, or country‑style spaces.
- What types of furniture work best for a rustic barn wood finish?
- Many common furniture pieces work well with a rustic barn wood finish, especially items that already have simple, clean lines. Popular choices include:
– Dining tables and benches
– Coffee tables and end tables
– TV consoles and media stands
– Dressers, nightstands, and bed frames
– Entryway tables and hallway consoles
– Bookshelves and hutchesSolid wood furniture is ideal because it accepts sanding, staining, and paint layers more consistently. Veneer and laminate pieces can still work, but they usually need extra prep, such as light sanding and a strong bonding primer, to help the finish adhere.
Flat, broad surfaces show off the barn wood look best, while simple shapes allow the texture and layered colors to stand out without feeling too busy.
- What basic steps are involved in creating a rustic barn wood finish on furniture?
- The process usually follows a simple, repeatable sequence. The exact products can change, but the main steps stay the same:
1. Clean the surface
Remove grease, dust, and old polish with a degreaser or mild cleaner. Let it dry completely.2. Sand or scuff sand
– For raw or unfinished wood: sand to smooth rough spots and open the grain.
– For finished pieces: scuff sand to dull the existing finish so new products can grip.3. Apply a base color
Use a medium gray, warm brown, or greige stain/paint as the foundation. Wipe or brush it on, then remove excess for a natural, uneven look.4. Layer lighter and darker tones
– Light gray, white, or beige for a sun‑washed effect.
– Dark brown or charcoal in small amounts to deepen knots, corners, and grain lines.
Techniques like dry brushing and thin color washes help create subtle variation.5. Light distressing (optional)
Gently sand edges, corners, and high‑use areas so the base color peeks through, mimicking natural wear.6. Seal the finish
Protect the look with a matte or satin clear coat such as polyurethane, polycrylic, or a durable furniture wax. A low sheen keeps the barn wood effect believable and soft.Following this basic flow keeps the finish controlled while still leaving room for unique character on each piece.
- Which colors work best to create an authentic barn wood look?
- Authentic barn wood often shows layered tones that came from sun, rain, and age over time, not just one flat shade. The most convincing rustic barn wood finishes usually combine:
– Grays: weathered gray, driftwood gray, or warm greige to mimic sun‑bleached boards.
– Warm browns: light to medium brown for the look of natural, aged wood underneath.
– Soft whites and creams: whitewash or off‑white for a farmhouse, coastal, or cottage feel.
– Charcoal accents: very dark gray or almost‑black in small amounts to deepen grain and knots.Cool grays pair well with modern farmhouse styles, while warmer browns and greiges feel more traditional and cozy. A mix of at least two, and often three tones, helps the finish look like it aged slowly instead of being painted in one step.
- How can the wood grain and texture be highlighted for a more natural rustic effect?
- Highlighting grain and texture is one of the most important parts of a rustic barn wood finish. A few simple techniques help bring out that natural, weathered character:
– Wire brushing: Lightly brushing along the grain with a wire brush raises the softer wood fibers, adding subtle grooves that catch stain and glaze.
– Sanding with the grain: Sanding in the same direction as the grain smooths the surface but still keeps natural patterns visible.
– Stain layering: Applying a darker stain first, then wiping back and layering a lighter wash over the top, makes the grain stand out without looking harsh.
– Dry brushing: Using a nearly dry brush with a small amount of paint or stain and dragging it lightly across the surface lets the raised grain pick up color while deeper areas stay darker.
– Selective darkening: Pressing a bit of darker stain into knots, cracks, and end grain areas adds dimension and a naturally aged look.These techniques together help furniture feel like real reclaimed wood, even when the lumber started out new.
- Is distressing always necessary for a rustic barn wood finish, and how can it be kept subtle?
- Distressing is optional. Many rustic barn wood finishes rely more on layered color and texture than heavy scuffs or gouges. A piece can still feel rustic and farmhouse‑inspired with very minimal wear marks.
For a subtle, controlled distressed look:
– Focus on natural wear spots: Soften only edges, corners, drawer fronts, and handles where real use would occur.
– Use fine‑grit sandpaper: Light sanding with 220‑grit or higher prevents harsh scratches.
– Work slowly: Sand a little, step back, and check the effect before removing more finish.
– Avoid random damage: Skip deep dents, heavy chain marks, or over‑sanded flat areas if a cleaner rustic look is preferred.This approach keeps furniture looking gently aged and well‑loved, rather than overly beaten or fake.
- How can a rustic barn wood finish be protected so it holds up to everyday use?
- Protection matters, especially on pieces that see daily use such as dining tables, coffee tables, and dressers. A good topcoat preserves the rustic look while standing up to spills, fingerprints, and light bumps.
Common protective options include:
– Water‑based polyurethane or polycrylic: Dries clear, resists yellowing, and is a strong choice for light or gray finishes. A matte or satin sheen works best for an authentic barn wood feel.
– Oil‑based polyurethane: Very durable and great for warm brown tones, though it can slightly darken or amber the color.
– Furniture wax: Adds a soft, low‑sheen layer that feels traditional and smooth. Works well on low‑traffic pieces or for touch‑ups.Multiple thin coats usually provide better protection than one heavy coat. Light sanding between coats with a very fine grit helps the final finish feel smooth to the touch while still allowing the rustic barn wood character to shine through.
Categories
Home Improvement Tips & Tricks